Medical Disclaimer:
This article is for general informational and educational purposes only. It is not a substitute for professional medical advice, diagnosis, or treatment. Always consult a licensed healthcare provider before starting any new exercise program — especially if you have a pre-existing injury, health condition, or are pregnant or postpartum. Individual results vary based on fitness level, consistency, age, and nutrition.
The Only 30 Minute At Home Ab Workout You’ll Ever Need (No Equipment, Beginner to Advanced)
Let me tell you something embarrassing.

For the first three months of my home fitness journey, I thought doing 200 crunches every night was the answer. I’d lie on my bedroom floor — neck aching, hip flexors on fire — and wonder why my stomach looked exactly the same. No definition. No real strength. Just a sore neck and a bruised ego.
What changed everything wasn’t a new exercise or a supplement. It was finally understanding that the core is not one muscle. Once I rebuilt my routine around that idea, a structured 30 minute at home ab workout done three times per week did more in six weeks than six months of crunch marathons ever had.
This guide is everything I wish I’d had back then. A real, well-structured 30 minute at home ab workout — with science behind it, progressions built in, and honest answers to the questions everyone types at 2 AM.
Why 30 Minutes Is the Sweet Spot for Core Training at Home
There’s a common belief that more time equals more results. With ab training, that’s simply not true.
Your core muscles — the rectus abdominis, internal and external obliques, and the deep transverse abdominis — respond best to quality and variety, not sheer volume. After about 30 minutes of focused, structured work, you hit a point of diminishing returns. Form breaks down. The hip flexors take over. The risk of injury climbs.
A well-designed 30 minute at home ab workout hits every layer of your core with intention, uses rest strategically, and leaves your muscles properly fatigued — not just beaten up.
This structure changed my training completely. And based on the science, it’s the structure that actually works. and we also have exercises for female.
The Four Core Muscle Groups You Need to Train
Before you do a single rep, understand what you’re actually training. This is the section most ab workout guides skip — and it’s why those guides don’t deliver lasting results.
Rectus Abdominis — The “six-pack” muscle, running vertically down the front of your abdomen. Most people train this exclusively. Movements: crunches, V-ups, leg raises.
External and Internal Obliques — Running diagonally along the sides of your waist. Responsible for rotation and lateral stability. Without strong obliques, you’ll never develop that tapered-waist look no matter how many crunches you do. Movements: Russian twists, bicycle crunches, side planks.
Transverse Abdominis (TVA) — The deepest abdominal muscle. It wraps around your spine like a natural weight belt, stabilizes your pelvis, and forms the foundation every other core muscle builds on. Most people have almost no conscious connection to this muscle. Movements: dead bugs, bird dogs, abdominal vacuums, hollow holds.
A complete 30 minute at home ab workout must train all four groups. If you’re only doing crunches and leg raises, you’re training roughly 25% of your core — and that’s exactly why results stall so quickly.
Before Your First Rep: The 90-Second Deep Core Activation Drill
This is the single technique that separates effective core training from going through the motions.
Lie on your back, knees bent, feet flat. Place your fingertips just inside your hip bones. Take a slow, deep breath in through your nose. Now exhale through your mouth slowly — like you’re fogging up a cold mirror. As the air leaves your body, feel your belly draw gently inward and downward. That subtle tightening under your fingertips? That is your transverse abdominis switching on.
Do this 5-6 times before every session.
Research published in the International Journal of Sports Physical Therapy (2017) confirmed that TVA activation and timing both improve significantly following core stability training that emphasizes proper breathing technique. The breath is the on-switch for your deep core. Skip this drill and you’re doing ab exercises with the foundation turned off.
It takes 90 seconds. It makes everything that follows measurably more effective.
The Complete 30 Minute At Home Ab Workout
Equipment needed: A yoga mat, folded blanket, or thick towel. Nothing else.
Format: 4 circuits × 4 exercises | 45 seconds work — 15 seconds rest | 60 seconds between circuits | 2 complete rounds per circuit
Total time: 28–32 minutes
Suitable for: All fitness levels. Beginner modifications and advanced progressions listed for every exercise.
Frequency: 3 times per week (e.g. Monday, Wednesday, Friday)
Space required: Whether you’re working out in a small apartment in Karachi, a flat in Manchester, a studio in Dubai, or a living room in Sydney — this 30 minute at home ab workout requires no more than a 2m × 1m floor space. No gym membership. No equipment. No financial barrier.
Circuit 1: Deep Core Activation — The Foundation Phase
Do not rush this circuit. It looks easy. It is not. The slower and more controlled your reps, the harder your deep core has to work.
Exercise 1: Dead Bug 45 seconds | Targets: TVA, spinal stabilizers, lower abs
Lie on your back, arms pointing straight up toward the ceiling, knees bent at 90 degrees. Exhale and brace your core — imagine drawing your navel toward your spine without holding your breath. Slowly lower your right arm toward the floor behind your head while simultaneously extending your left leg until it hovers a few inches above the mat. Pause. Return both limbs to center. Switch sides.
The one rule: your lower back must stay completely flat against the mat throughout. The moment it arches, your hip flexors take over and your abs switch off.
Beginner modification: Only lower one arm at a time, keeping both feet flat on the floor.
Why it works: The dead bug trains your core to stabilize the spine while the limbs move — exactly how your core functions during walking, lifting, and everyday life. This is why physical therapists prescribe it for lower back pain rehabilitation.
Exercise 2: Bird Dog 45 seconds | Targets: TVA, anti-rotation stability, lower back
Start on all fours, wrists under shoulders, knees under hips, spine neutral. Exhale, brace your core, then simultaneously extend your right arm forward and your left leg straight behind you. Hold 2 seconds. Return without rotating your hips. Switch sides.
Advanced: At the top, draw your elbow and knee together slowly beneath your body before extending again.
Common mistake: Letting the hip of the extended leg drop. If your hips aren’t level, slow down or shorten the range of motion until you build the necessary stability.
Exercise 3: Hol

low Hold 45 seconds | Targets: Rectus abdominis, TVA, full anterior core tension
Lie flat on your back. Press every vertebra of your lower back into the mat — non-negotiable. Tuck your chin slightly, lift your shoulders a few inches off the ground, and raise both legs to roughly 45 degrees. Arms reach toward your feet. Hold the shape.
The lower your legs, the harder this becomes. Start high and progress lower as you get stronger.
Beginner modification: Bend your knees to 90 degrees (table-top) while holding.
This is the same foundational position gymnasts train for rings, bars, and floor work. For the rest of us, it builds the core tension that makes every other exercise more effective.
Exercise 4: Abdominal Vacuum 45 seconds | Targets: Transverse abdominis specifically
Stand or sit upright. Exhale completely — empty your lungs as fully as possible. Now draw your belly button inward and upward, as if trying to press your navel toward your spine. Hold 10–15 seconds while breathing lightly. Relax. Repeat.
This looks like nothing. Research by Critchley et al. found the vacuum maneuver produces significantly higher TVA contraction than many traditional ab exercises. Bodybuilders have used it for decades to develop that deep, tight core that shows even at rest.
AEO DIRECT ANSWER — “What is an abdominal vacuum?”: An abdominal vacuum is a core exercise where you exhale fully and draw your navel toward your spine, holding for 10–15 seconds to directly activate the transverse abdominis. It requires no equipment and can be performed standing, sitting, or kneeling.
→ Rest 60 seconds. Complete Round 2 of Circuit 1.
Circuit 2: Upper Abs and Rectus Abdominis Loading
With your deep core properly activated from Circuit 1, you can now safely load the outer abdominal muscles. This circuit targets the upper rectus abdominis — the most visible section when body fat is managed.
Exercise 1: Slow Crunch with Controlled Exhale 45 seconds | Targets: Upper rectus abdominis, TVA on exhale
Lie on your back, knees bent, feet flat. Cross your arms over your chest — not behind your head (that transfers load to your neck). Exhale as you curl your shoulder blades off the mat, hold 1 second at the peak, lower over 3 slow counts.
The exhale is everything. Breathing out during the crunch forces TVA engagement simultaneously, making each rep compound — not just isolated. One slow, correct crunch is worth ten rushed ones.
Exercise 2: Seated Knee Tuck 45 seconds | Targets: Lower rectus abdominis
Sit on your mat, hands lightly behind your hips. Lean back to 45 degrees and lift your feet. Draw both knees into your chest. Extend them back without letting your feet touch the mat. Feel the work in your lower abdomen — not in your thighs.
Advanced: Extend legs lower toward the floor on each rep, just short of touching.
Exercise 3: V-Up 45 seconds | Targets: Full rectus abdominis, coordination
Lie flat, arms extended overhead. In one simultaneous movement, lift both straight legs and your upper body to form a V-shape, reaching toward your feet. Lower both with control.
Too challenging initially? Alternate: upper body only for one rep, legs only for the next. Build to the full movement over a few weeks.
Exercise 4: Cross-Body Mountain Climber 45 seconds | Targets: Obliques, rectus abdominis, cardiovascular demand
High plank position, shoulders over wrists. Drive your right knee diagonally toward your left elbow. Return fully. Switch sides. The cross-body path activates the obliques significantly more than a straight mountain climber. Control your pace — speed kills the engagement.
→ Rest 60 seconds. Complete Round 2 of Circuit 2.
Circuit 3: Obliques and Rotational Strength
Most people replace this circuit with more crunches. That’s a mistake. Your obliques narrow the waist visually, generate rotational power, and provide lateral stability. Without them, your core is incomplete regardless of how strong your front is.
Exercise 1: Russian Twist 45 seconds | Targets: Internal and external obliques
Sit with knees bent, feet flat or lifted. Lean back to 45 degrees. Clasp your hands together and rotate your torso side to side, tapping the mat beside each hip. The rotation comes from the ribcage — your hips stay relatively still.
Advanced: Extend both legs to 45 degrees while rotating.
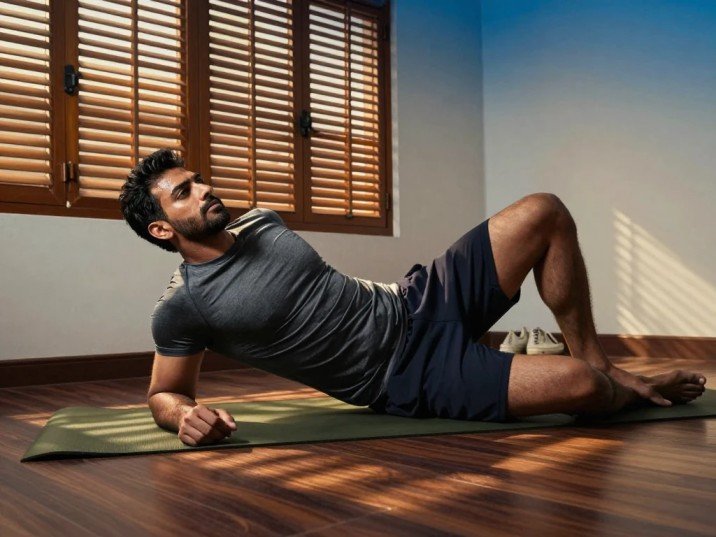
Exercise 2: Side Plank Hold 45 seconds each side | Targets: Lateral core, external obliques, glute medius
Lie on your right side, forearm on the mat under your shoulder, feet stacked. Lift your hips to create a straight line from head to feet. Hold. Switch sides after 45 seconds. This becomes a 90-second exercise — and both sides deserve equal attention.
Beginner modification: Drop your bottom knee to the mat while keeping your hips lifted.
Side planks are one of the few exercises that load the quadratus lumborum — the deep muscle connecting your lower ribs to your pelvis — which is a primary contributor to lateral lower back pain in desk workers.
Exercise 3: Bicycle Crunch 45 seconds | Targets: Obliques, rectus abdominis in rotation
On your back, hands loosely behind your head. Lift both legs off the floor. Bring your right elbow toward your left knee as you extend the right leg. Switch in a slow, deliberate pedaling motion. Full torso rotation — not just elbow-to-knee contact. A slow bicycle crunch with genuine rotation engages the obliques approximately twice as effectively as a fast, sloppy one.
Exercise 4: Windshield Wiper 45 seconds | Targets: Obliques, lower abs, hip stabilizers
Lie on your back, arms extended out to sides like a T. Raise both legs to 90 degrees, knees slightly bent. Slowly lower both legs together to the right, hovering a few inches from the mat. Return to center. Lower to the left.
Your core fights gravity the entire time. The oblique on the side opposing the lowering movement does most of the work — and you’ll feel it immediately.
Beginner modification: Bend knees more and reduce the range of lowering.
→ Rest 60 seconds. Complete Round 2 of Circuit 3.

Circuit 4: Lower Abs and Finisher
Lower ab work is notoriously hard to feel correctly. The hip flexors are stronger and larger and will immediately compensate if form breaks. The single rule for this entire circuit: lower back flat on the mat, exhale on every single effort.
Exercise 1: Leg Raise 45 seconds | Targets: Lower rectus abdominis, TVA
Lie flat on your back, hands palms-down beneath your lower back. Legs straight. Lift them to 90 degrees. Lower slowly — stopping 2–3 inches from the mat. Repeat.
If your lower back peels off the mat, the range of motion is too large for your current strength. Bend your knees and perform the same movement with bent legs until you build the required control.
Exercise 2: Reverse Crunch 45 seconds | Targets: Lower abs, TVA
Lie on your back, hands flat at your sides. Knees bent at 90 degrees, feet lifted. Use your lower abs — not momentum — to curl your hips up off the mat, drawing your knees toward your chest. Lower slowly. This is a small, tight movement. The reverse crunch preferentially loads the lower rectus abdominis because the pelvis moves toward the ribcage rather than the other way around.
Exercise 3: Flutter Kick 45 seconds | Targets: Lower abs, hip flexors with core stabilization
Lie flat, hands under your glutes for support. Keep both legs straight, raised about 6 inches. Alternate rapidly kicking each leg up and down in small, controlled strokes. Lower back stays pressed into the mat throughout.
Within 20 seconds, your lower abs should be burning noticeably. If you only feel it in your thighs, slow down and actively press the lower back harder into the mat.
Exercise 4: Plank to Downward Dog 45 seconds | Targets: Core stability, posterior chain, spine decompression
High plank. Push your hips up and back into a downward dog — hips toward the ceiling, heels pressing toward the floor. Return to plank. Repeat in a controlled rhythm.
This alternating movement challenges core stability across two very different positions and gently decompresses the spine at the end of a demanding session.
→ Rest 60 seconds. Complete Round 2 of Circuit 4.
Stretch for 3 minutes: child’s pose, cat-cow, and a seated spinal twist.
Full Exercise Reference Table
| Circuit | Exercise | Duration | Primary Target | Level |
|---|---|---|---|---|
| 1 | Dead Bug | 45 sec | TVA, spinal stabilizers | All levels |
| 1 | Bird Dog | 45 sec | TVA, anti-rotation | All levels |
| 1 | Hollow Hold | 45 sec | Full anterior core | Beginner+ |
| 1 | Abdominal Vacuum | 45 sec | TVA specifically | All levels |
| 2 | Slow Crunch | 45 sec | Upper rectus abdominis | All levels |
| 2 | Seated Knee Tuck | 45 sec | Lower rectus abdominis | All levels |
| 2 | V-Up | 45 sec | Full rectus abdominis | Intermediate |
| 2 | Cross-Body Mountain Climber | 45 sec | Obliques + cardio | All levels |
| 3 | Russian Twist | 45 sec | Internal + external obliques | All levels |
| 3 | Side Plank Hold | 45 sec/side | Lateral core | All levels |
| 3 | Bicycle Crunch | 45 sec | Obliques + rectus | All levels |
| 3 | Windshield Wiper | 45 sec | Obliques + lower abs | Intermediate |
| 4 | Leg Raise | 45 sec | Lower rectus abdominis | Intermediate |
| 4 | Reverse Crunch | 45 sec | Lower abs, TVA | All levels |
| 4 | Flutter Kick | 45 sec | Lower abs | All levels |
| 4 | Plank to Downward Dog | 45 sec | Core stability, spine | All levels |
For women: All exercises are suitable for all female fitness levels. The hollow hold and V-up can be modified during menstruation by reducing range of motion or swapping to the beginner version — listen to your body.
What Happens to Your Body in the First 4 Weeks
Week 1: You’ll feel muscles you didn’t know existed — especially from Circuit 1. The dead bug and hollow hold will seem deceptively hard. Soreness in the sides of your waist (obliques) is normal and expected.
Week 2: The deep core activation starts to happen more naturally. You’ll hold the hollow position longer before your lower back peels off the mat. Breathing pattern starts to feel automatic.
Week 3: Functional changes appear outside the workout. You’ll sit straighter without thinking about it. Your lower back feels less fatigued after long days of sitting.
Week 4: After approximately 12 sessions of this 30 minute at home ab workout, most people notice a measurably tighter midsection, stronger brace during other exercises, and significantly improved plank endurance.
Body fat and visible definition? Research consistently shows lower abs become visible at roughly 10–12% body fat for men and 14–17% for women. The workout builds the muscle. Nutrition and overall activity govern the body fat.
4-Week Progressive Overload Plan
Your muscles adapt to the same stimulus within 2–4 weeks. Here’s how to keep progressing with zero equipment:
Weeks 1–2: Master form and breathing. Do the 30 minute at home ab workout exactly as written. Speed means nothing yet.
Week 3: Add a slow eccentric. Take 4 full seconds on the lowering phase of every exercise. Eccentric loading significantly increases muscle stimulus without adding weight.
Week 4: Add isometric holds. Pause for 2–3 seconds at the hardest point of each exercise — top of a crunch, bottom of a leg raise, peak of a hollow hold. Time-under-tension recruits more muscle fibers.
Week 5+: Add minimal resistance. A filled 1.5-litre water bottle during Russian twists. A small backpack with a book during planks. Ankle resistance bands during leg raises. These cost nothing and make a real difference.
This progression model is what transforms a 30 minute at home ab workout from a casual routine into a structured training program.
The Breathing Rule That Multiplies Every Rep
Exhale on the hard part. Inhale on the easy part.
Crunch: exhale curling up. Leg raise: exhale lifting legs. Plank: breathe continuously — never hold.
When you exhale during a core exercise, the transverse abdominis contracts reflexively. Every rep becomes a TVA exercise on top of whatever you’re targeting. This is physiologically why breathing correctly during ab work makes a measurable difference in how much your deep core actually engages.
Holding your breath lets your spine stabilize through intra-abdominal pressurization rather than muscular engagement — bypassing the deep core entirely.
Breathe out on the hard part. Every single rep. No exceptions.
The Mistakes Keeping You From Results
Training abs every day without rest. Your core needs 48 hours of recovery between sessions. Three well-executed sessions per week will always beat seven exhausted, half-formed ones.
Skipping Circuit 1. The deep core activation circuit makes the other three circuits work properly. Without it, you’re loading muscles with the foundation switched off.
Using momentum instead of control. Speed is cheating in ab training. Momentum removes the load from your muscles and transfers it to your joints. Slow everything down by 30% and feel the difference immediately.
Relying on ab training for fat loss. Spot reduction has no credible research support. This 30 minute at home ab workout builds core strength and muscle. Fat loss comes from overall calorie deficit — primarily driven by diet and total daily movement.
Sucking in instead of bracing. “Suck in your stomach” is one of the most widespread and damaging ab cues. Sucking in compresses the abdominal cavity without engaging the right muscles. Instead, brace as if you’re about to take a light punch to the gut. Or use the TVA exhale cue from the beginning of this guide.

Who This Is For
This 30 minute at home ab workout was designed to work anywhere — any country, any home, any budget.
Beginners: Start with one round per circuit instead of two. Add the second round in Week 2. Every exercise has a modification that makes it genuinely accessible from day one.
Limited space (apartments, dorm rooms, small flats): You need roughly the length and width of your own body lying down. 2 metres by 1 metre is more than sufficient.
Hot climates (South Asia, Middle East, North Africa): Schedule sessions in the early morning or after sunset. Hydrate 30 minutes before. In rooms without air conditioning, reduce work intervals to 35 seconds and extend rest to 25 seconds on especially warm days.
Remote workers and desk-bound individuals globally: This workout directly addresses the specific weaknesses that develop from prolonged sitting — underactivated TVA, weak obliques, overactive hip flexors. The dead bug and bird dog in Circuit 1 are particularly relevant for desk workers.
Women postpartum: Please consult a pelvic floor physiotherapist before beginning any core program after childbirth. The abdominal vacuum and breathing activation from Circuit 1 are generally well-tolerated, but the full program should be individually cleared by a professional.
Who This Is For
Here’s the perspective shift that made the biggest difference in my own training.
Your core is not a “workout muscle.” It is an always-on system. Every time you breathe, walk, carry something, get up from a chair, or change position, your core is stabilizing and coordinating. The real purpose of a structured 30 minute at home ab workout is not to exhaust your core for 30 minutes. It is to make your core smarter, stronger, and more responsive for the other 23 hours and 30 minutes of your day.
This is why the exercises in Circuit 1 — the ones that look almost boringly simple — are the same movements prescribed by physical therapists for chronic lower back pain rehabilitation. They train the core to function the way it actually functions: stabilizing the spine while the rest of the body moves.
Real results from consistent core training don’t always show in the mirror first. They show when you carry bags without your lower back tightening. When you sit through long meetings without slumping. When you pick something up off the floor and it’s completely effortless. These functional wins come first. The aesthetic ones follow with consistent nutrition and training.
Sample Weekly Schedule
| Day | Session |
|---|---|
| Monday | 30 minute at home ab workout — all 4 circuits, 2 rounds |
| Tuesday | 20–30 min walk, light yoga, or complete rest |
| Wednesday | 30 minute at home ab workout |
| Thursday | Full-body strength or rest |
| Friday | 30 minute at home ab workout |
| Saturday | 30–45 min cardio — walking, cycling, swimming, dancing |
| Sunday | Active recovery — stretching, foam rolling, slow walk |
The Last Thing Worth Saying
Nobody needs a gym to build a strong core.
The 30 minute at home ab workout in this guide uses nothing but floor space, gravity, and the decision to show up. Do it three times a week. Follow the progressions. Breathe correctly. Give it 6–8 weeks before expecting dramatic visual changes.
What you’ll get in the meantime — and what genuinely lasts — is a core that works. One that supports you when you lift something heavy, keeps you standing straight after a long day, and makes everything else in your fitness life feel more stable.
That is worth 30 minutes. Three times a week. Starting today.
Written by a fitness blogger with 6+ years of home training experience. This article reflects personal experience combined with published research synthesis. It is not medical advice. Please consult a licensed professional before beginning any new exercise program.
Frequently Asked Questions
Q: What is a good 30 minute at home ab workout for beginners?
A: A good beginner 30 minute at home ab workout targets all four core muscle groups using bodyweight exercises with accessible modifications. This program — built around dead bugs, bird dogs, hollow holds, reverse crunches, bicycle crunches, and side planks — is designed to be genuinely beginner-accessible while still being effective. Start with one round per circuit and progress to two rounds over the first two weeks.
Q: Can I get visible abs from a 30 minute at home ab workout?
A: Core training builds the abdominal muscles. Visible definition depends on body fat percentage — roughly 10–12% for men and 14–17% for women. A 30 minute at home ab workout three times per week will build strong, defined muscles. Whether those muscles are visible depends primarily on nutrition and overall energy balance.
Q: How long does it take to see results from a 30 minute ab workout at home?
A: Functional results — stronger brace, improved posture, reduced lower back fatigue — typically appear within 3–4 weeks of consistent training. Aesthetic results vary based on starting body composition. Most people notice a noticeably tighter midsection within 6–8 weeks at three sessions per week.
Q: Is 30 minutes of ab work every day too much?
A: Thirty minutes of ab work three times per week is optimal for most people. Daily sessions without rest days can lead to cumulative fatigue rather than progressive adaptation — core muscles need recovery time like any other muscle group.
Q: Do I need equipment for a 30 minute at home ab workout?
A: No. This entire program uses bodyweight only. A yoga mat or folded blanket improves comfort on hard floors but is not required.
Q: What should I eat before a 30 minute ab workout at home?
A: For a 30-minute session, a large meal is unnecessary. A light snack (banana, toast with nut butter, a small handful of dates) 30–45 minutes before is ideal if training in the morning. A balanced meal 1.5–2 hours before works well for afternoon or evening sessions.
Q: Why do I feel ab exercises in my lower back instead of my abs?
A: Lower back compensation during ab work almost always indicates an underactivated transverse abdominis. Start every session with the breathing activation drill. During floor exercises, actively press your lower back into the mat and exhale on every effort. Slowing the movement down by half usually resolves the compensation immediately.
Q: Can a 30 minute at home ab workout help with lower back pain?
A: Research supports that strengthening the core — particularly the TVA and obliques — reduces non-specific chronic lower back pain. If you currently have acute pain, an injury, or a diagnosed spinal condition, consult a physiotherapist before beginning. The exercises in Circuit 1 (dead bug, bird dog) are among the most commonly prescribed for lower back rehabilitation.
Q: How many calories does a 30 minute at home ab workout burn?
A: A core-focused 30-minute session typically burns between 150–250 calories depending on body weight and intensity. For significant calorie expenditure, combine this program with cardio sessions on alternate days.
Q: Is this workout suitable for women over 40?
A: Yes — the deep core focus of Circuit 1 is particularly well-suited for women at any age. Women over 40 should pay close attention to pelvic floor comfort during high-effort exercises like V-ups and leg raises, and should work with a pelvic health physiotherapist if they notice any symptoms during training..